Setting up a VPN access server on AWS using Terraform
Using a VPN server is a great way to directly connect to AWS resources like databases or EC2 instances deployed to private subnets. Bastion hosts have long been an industry practice for this purpose, but running a VPN server is a great alternative.
This article will walk through deploying an OpenVPN host on an EC2 instance using Terraform. This assumes you have an existing VPC created with both public and private subnets.
Requirements
- AWS account
- AWS CLI
- Terraform CLI
Create EC2 Instance
OpenVPN has two licencing models that will work with AWS: bring your own licence or use an OpenVPN AMI for a specific number of users (5, 10, etc.). In this case, we will use the OpenVPN AMI, but the process for bringing your own licence is very similar.
Add the following to a .tf file. This assumes you already have a Terraform configuration established with an AWS provider.
Setup Terraform variables
These are need to launch the ECS instance. The variable can either be passed in when running terraform apply or replace with variable from an existing terraform configuration.
variable "vpc_id" {}

variable "public_subnet_id" {}

variable "keyname" {
  description = "A pre configured EC2 SSH key pair"
}

variable "ami" {
  description = "This is the AMI for the most recent version of OpenVPN access server with 10 connected devices"
  default = "ami-0a2cf15ad1bf3fef4"
}
Create a new security group
We need to put the VPN access server in a security group with access rules. This will also be used to allow traffic from the VPN to access specific resources within your VPC.
You will notice that the security group allows access from the ports tcp/22, tcp/943, tcp/443 and udp/1194. These are required to be open for the SSH access and for the VPN to function properly.
resource "aws_security_group" "vpn_access_server" {
  name        = "tf-sg-vpn-access-server"
  description = "Security group for VPN access server"
  vpc_id      = "${var.vpc_id}"

  tags = {
    Name = "tf-sg-vpn-access-server"
  }

  ingress {
    protocol  = "tcp"
    from_port = 22
    to_port   = 22
    cidr_blocks = ["0.0.0.0/0"]
  }

  ingress {
    protocol  = "tcp"
    from_port = 943
    to_port   = 943
    cidr_blocks = ["0.0.0.0/0"]
  }

  ingress {
    protocol  = "tcp"
    from_port = 443
    to_port   = 443
    cidr_blocks = ["0.0.0.0/0"]
  }

  ingress {
    protocol  = "udp"
    from_port = 1194
    to_port   = 1194
    cidr_blocks = ["0.0.0.0/0"]
  }

  egress {
    protocol    = "-1"
    from_port   = 0
    to_port     = 0
    cidr_blocks = ["0.0.0.0/0"]
  }
}
Launch an EC2 instance
This launches a new EC2 instance using the OpenVPN AMI. This means that OpenVPN and all of its requirements will be pre-installed our your machine. Here we're launching on a t2.nano instance which is sufficient for up to 10 users. If your VPN will have more users, a larger instance may be required.
resource "aws_instance" "vpn_access_server" {
  ami                         = "${var.ami}"
  instance_type               = "t2.nano"
  vpc_security_group_ids      = ["${aws_security_group.vpn_access_server.id}"]
  associate_public_ip_address = true
  subnet_id                   = "${var.public_subnet_id}"
  key_name                    = "${var.keyname}"

  tags = {
    Name = "tf-vpn-access-server"
  }
}
Attach an Elastic IP to the EC2 instance
Attaching an Elastic IP to your EC2 instance will ensure that the VPN access server's public IP address will remain the same, even if the underlying instance changes. This also outputs the public DNS of the server after creation.
resource "aws_eip" "vpn_access_server" {
  instance = "${aws_instance.vpn_access_server.id}"
  vpc = true
}

output "vpn_access_server_dns" {
  value = "${aws_eip.vpn_access_server.public_dns}"
}
Create infrastructure
Run terraform apply to create the infrastructure on your AWS account. This will take a few minutes to provision.
Run the OpenVPN install wizard
Once the infrastructure is provisioned and your EC2 instance is healthy, connect to the instance via SSH.
ssh openvpn@PUBLIC_DNSThis will prompt you to run through the install wizard. You can customize the VPN access server, but most of the default options are fine. Additionally, set a password for the user openvpn
passwd openvpnSetup DNS
This step is optional, but recommended. Setup a CNAME record from a domain or sub-domain to point to the public_dns record of your VPN access server. This is so that you can access the VPN from something like https://vpn.example.com.
Add an SSL cert for https
Right now you should be access you VPN's admin GUI by going to https://vpn.example.com/admin. However, your browser will show a warning as the SSL cert is not valid. You can bypass this warning to access the admin, but we should setup a valid SSL cert.
There are lots of ways to get a certificate, but we're going to use ZeroSSL.
Walk through the wizard to create a new Let's Encrypt certificate. You will be required to verify your domain as part of this process.
Copy the Certificate, CA Bundle and Private Key to files.
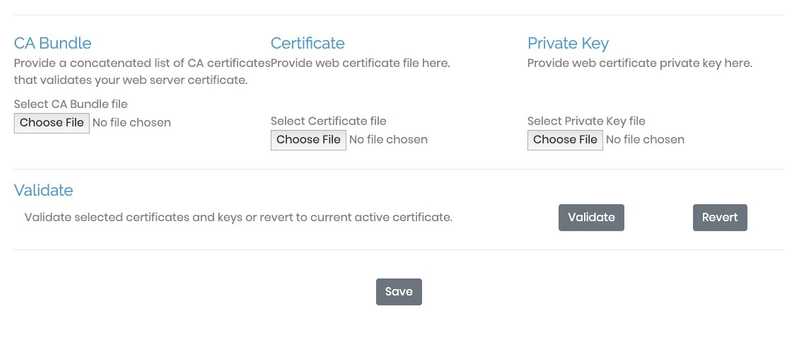
Login to your VPN access server GUI using the user openvpn and created on the server. Navigate to Settings > Web Server. From there, upload the Certificate, CA Bundle and Private Key files. Click validate and save if there are no errors.
Setup Users
Once the VPN is setup, users can be added from the admin section of your access server. I would recommend enable MFA (supports Google Authenticator) and enabling auto-login.
Download OpenVPN client to device
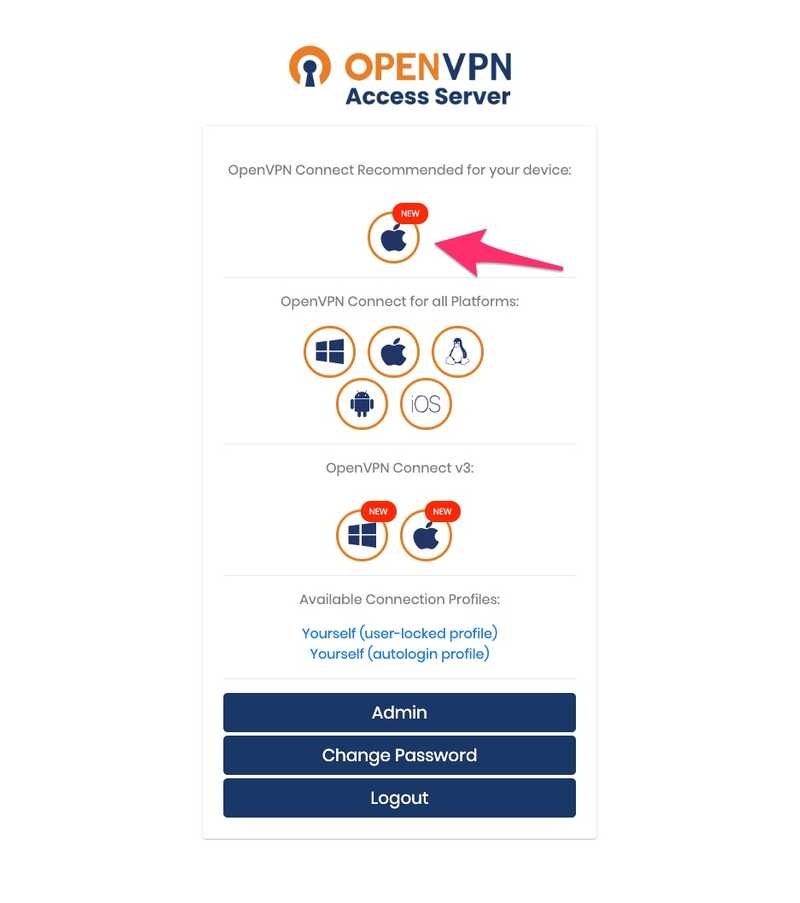
After creating a user account, users can download the OpenVPN client and connect to the VPN. This is made really easy if users are using a Mac (haven't tested on other devices) as they can download a pre-configured package with their access certificate. Navigate to the VPN URL in the browser and click the Apple logo to download. Once downloaded, run the .pkg file and it will setup the VPN client.
Stephen Greer
Stephen is a full stack web engineer.
He works as a lead engineer for FanSided, a media company running 300+ sport and entertainment websites.


